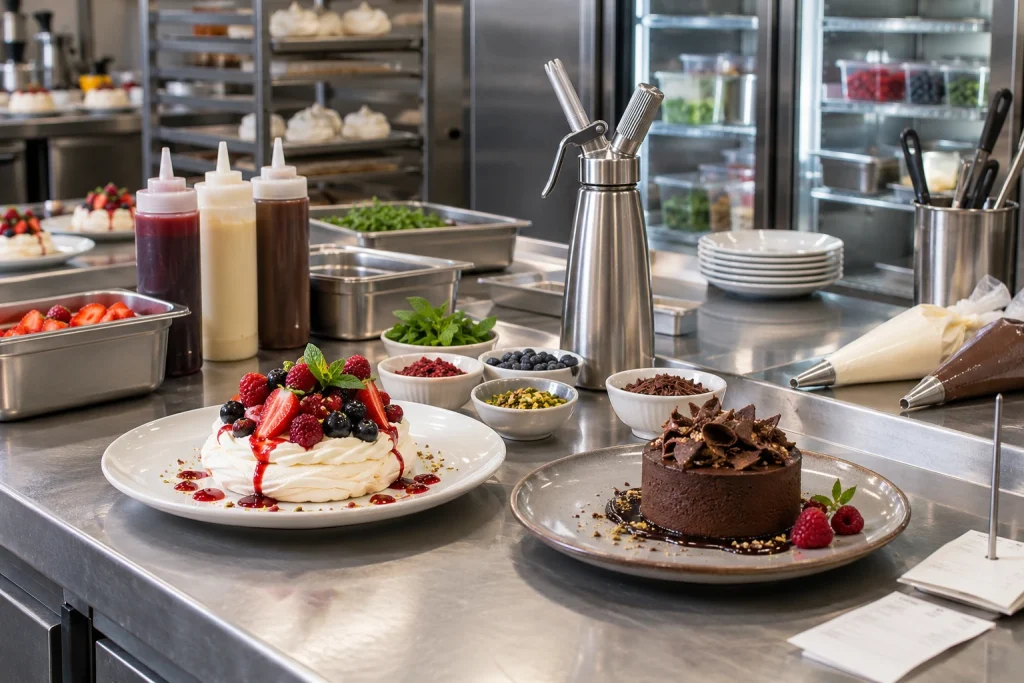
Dessert service can expose small weaknesses in a kitchen’s organisation. A sauce stored in the wrong fridge, a missing garnish or an overfilled piping bag may cost only a minute, but those minutes accumulate when several tables reach their final course together.
A useful dessert station is therefore more than a clear section of worktop. It is a planned sequence that takes a plate from storage to assembly, finishing and handoff with as little wasted movement as possible. The right layout also makes portion control easier, protects delicate ingredients and gives every member of the team a repeatable method.
The aim is not to equip the station with every available tool. It is to match the space, equipment and preparation plan to the desserts the restaurant actually sells.
Begin With the Menu and Peak Ticket Volume
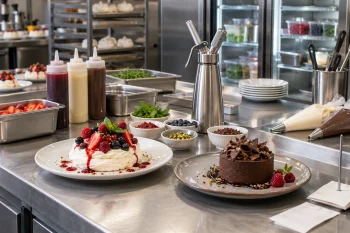
Start with the finished menu rather than the available cupboard space. List each dessert and break it into the actions required after a ticket arrives. A plated tart might need a chilled slice, sauce, whipped cream and a crisp garnish. A hot pudding may require reheating, a cold accompaniment and a final dusting. A sundae involves more components but little cooking.
This exercise reveals which actions are shared. If four desserts use the same berry sauce, that sauce deserves a fixed, convenient position. If only one dish uses a fragile sugar decoration, it can remain protected until needed rather than occupying the centre of the station.
Next, estimate the busiest realistic period. A station designed for the average hour may struggle when a large table and several smaller parties order dessert at once. Count how many plates one person should be able to finish during a short rush, then check whether the storage, tools and work surface can support that output without crowding.
Arrange the Station in Service Order
The simplest layout follows the journey of the plate. A practical sequence is:
-
clean plates and bowls;
-
chilled or pre-portioned base components;
-
sauces and soft finishes;
-
dry garnishes and final checks;
-
service handoff.
Place frequently used items within easy reach and occasional items slightly farther away. Staff should not need to cross behind one another to reach the same refrigerator or cutlery drawer. Where the kitchen allows it, keep a clear landing space at both the beginning and end of the station so incoming tickets do not become mixed with finished plates.
Avoid treating vertical space as an afterthought. A shallow shelf can hold clean bowls and small plates, while labelled containers beneath the counter can organise spare utensils and dry garnishes. Everything should still be easy to remove and clean; a surface that looks efficient but collects crumbs around permanent fixtures soon becomes a burden.
Separate Cold, Ambient and Crisp Components
Desserts often combine ingredients that need very different storage. Cream, custard, mousse and cut fruit must remain properly chilled according to the recipe, ingredient label and the kitchen’s food-safety procedures. Biscuits, meringues, nuts and wafers need protection from moisture. Chocolate decorations may be stable at a cool room temperature but soften beside hot equipment.
Keep these groups physically separate until assembly. A covered tray of crisp garnishes should not sit directly above an open chilled pan where condensation can reach it. Sauces that look similar need clear labels, especially when one contains an allergen or alcohol.
Prepare only the quantity that can be used within the planned service window. Smaller containers are easier to handle and help protect the main batch from repeated warming. When a container is low, replace it with a prepared backup rather than combining new and old batches without checking the kitchen’s stock-rotation rules.
Standardise Portions Before the Rush
Consistency is easier to achieve through tools and reference points than memory. Choose the correct spoon, scoop, ladle or bottle for each component and keep it with that ingredient. Marking the fill line on an internal prep container can help the team reproduce a batch, while a simple plating photograph can show the intended position and scale of each element.
Not every plate needs to look mechanically identical. Fruit varies naturally, and a spooned sauce will never form precisely the same shape twice. The important standards are the ones that affect cost, balance and the guest experience: the size of the main portion, the amount of sauce, the quantity of cream and the number of garnishes.
Test the chosen portions together. A generous spoonful of rich sauce may overwhelm a delicate mousse, even if both quantities look reasonable on their own. The final standard should be based on the whole plate rather than the cost of each component in isolation.
Choose Finishing Tools for the Texture and Output
Piping bags remain useful for thick creams, ganache and preparations that need a defined decorative shape. Squeeze bottles suit smooth sauces and purées, provided the opening matches the texture and the mixture has been strained where necessary. Spoons and small offset spatulas offer more freedom for lower-volume, individually styled plates.
For repeated portions of whipped cream, foams or other compatible culinary preparations, a restaurant may compare commercial cream dispensers with conventional piping methods. The best choice depends on the recipe, expected output, cleaning routine and the manufacturer’s stated uses.
Any pressurised culinary equipment should be handled by trained adults only. Use compatible components, stay within the stated capacity and follow the manufacturer’s assembly, charging, storage and cleaning instructions exactly. Never improvise fittings or use damaged equipment. Mixtures should be prepared to the recipe and strained when required so seeds, zest or solid particles cannot obstruct the nozzle.
Keep a backup finishing method available. Equipment may need cleaning or a nozzle may be unsuitable for a particular texture. A chilled bowl, spoon or prepared piping bag can keep service moving without changing the guest’s order.
Build Allergen Checks Into the Layout
Allergen control should be visible in the organisation of the station, not left to a verbal reminder during a rush. Label every prepared component and retain the ingredient information needed by the restaurant’s allergen procedure. Give allergen-specific garnishes their own clean, covered containers and utensils.
Pay particular attention to toppings. Chopped nuts, biscuit crumbs, chocolate pieces and sauces are easy to scatter across a small work area. Position them so that utensils do not pass over neighbouring containers, and clean spills immediately rather than waiting until the end of service.
When the kitchen accepts an order requiring special handling, follow its documented process from preparation to handoff. A separate utensil is useful only if the surrounding surface, hands and other components are also managed correctly. If the team cannot meet a request safely, staff should communicate that clearly rather than improvising.
Plan Replenishment as Part of Service
A neat station at opening time can become chaotic if replenishment has not been planned. Decide where backup batches will be stored, who is responsible for checking levels and how low a container should become before it is replaced.
Use a short par list for the busiest period. It might specify two bottles of chocolate sauce, one covered tray of garnishes, a set number of tart portions and one backup batch of cream. The quantities should reflect actual sales rather than a guess made once and never reviewed.
Record what is consistently left over and what runs out. After several services, those notes will show whether the station is overproducing expensive components or relying on emergency preparation during the rush. Adjusting a par level is often more effective than adding another shelf or buying more equipment.
Run a Timed Service Test
Before launching a new dessert or rearranged station, rehearse a realistic group of tickets. Include several different dishes and at least one repeated order. Time the sequence, but pay equal attention to movement and interruptions.
Look for questions such as:
-
Does the cook turn around repeatedly for the same item?
-
Do two tools compete for one narrow section of worktop?
-
Are chilled items left out while another plate is completed?
-
Is the final garnish easy to forget?
-
Can another team member read the labels and follow the plating reference?
Move one or two items, then repeat the test. Changing everything at once makes it difficult to identify which adjustment helped. A small shift, such as placing sauce bottles after the chilled components instead of before them, may remove unnecessary crossing and make the order of work more intuitive.
Create a Closing Reset, Not Just a Cleaning List
Cleaning is central to closing the station, but the reset should also prepare the next service. Follow the kitchen’s cleaning schedule and the instructions for each piece of equipment. Disassemble tools only as directed, check seals and nozzles where applicable, and allow washed components to dry properly before storage.
Dispose of or store prepared food according to the recipe, ingredient instructions and food-safety plan. Date and label retained batches, count unopened backups and note anything that must be prepared before the next shift.
Finish by restoring every tool to its assigned position. A station is not reset if the next cook has to search for a scoop, replace an empty sauce bottle or discover that there are no clean dessert plates after the first ticket arrives.
Make Consistency the Result of the System
Fast dessert service does not come from asking the team to move faster. It comes from removing avoidable decisions and journeys. When the menu determines the equipment, the layout follows the order of assembly, and portions have clear standards, speed becomes a natural result of the station’s design.
Review the setup whenever the menu, sales pattern or staffing changes. A station that suited three plated desserts may not suit a new sundae menu or a larger weekend service. Treat it as a working system, observe where pressure appears and make small, testable improvements.
The reward is more than a shorter ticket time. Desserts reach the table in better condition, portions stay controlled and the kitchen can finish the meal with the same confidence it brought to the first course.